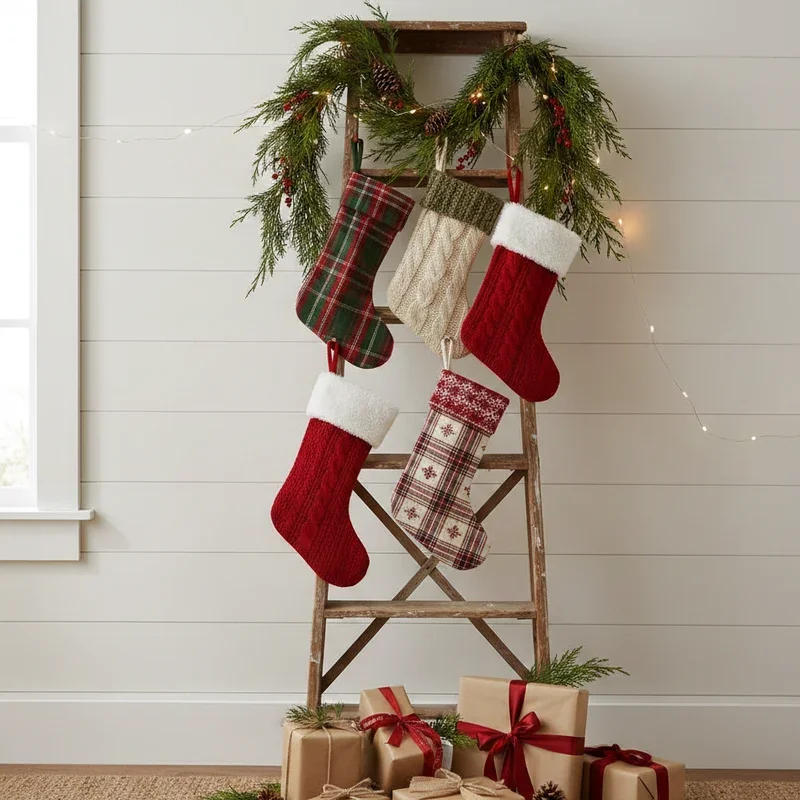
How to Hang Garland on Fireplace Step by Step
Learn how to hang garland on fireplace step by step with our complete guide. Create stunning holiday displays using simple techniques.
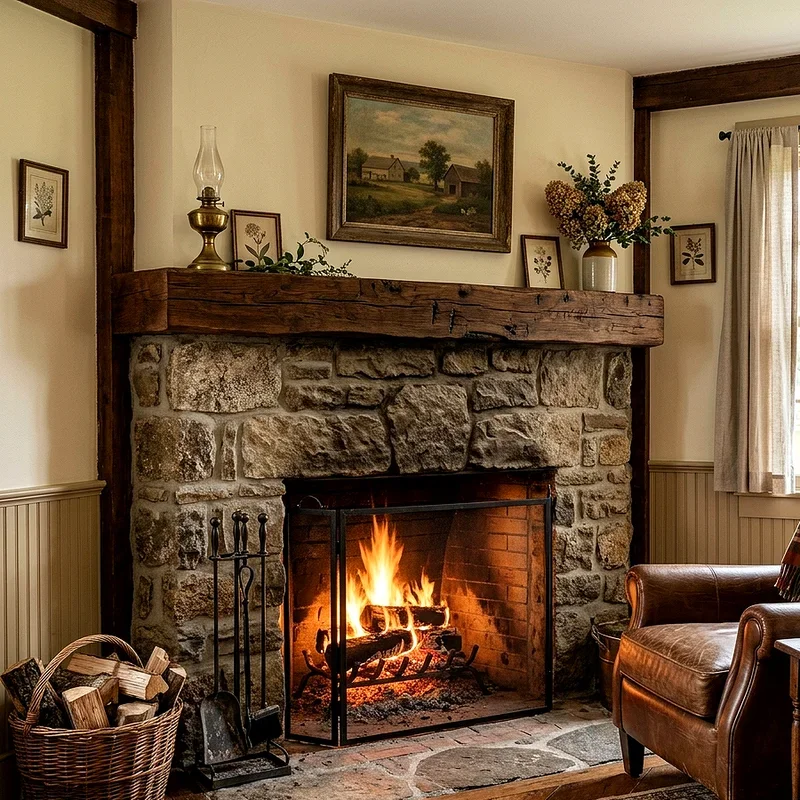
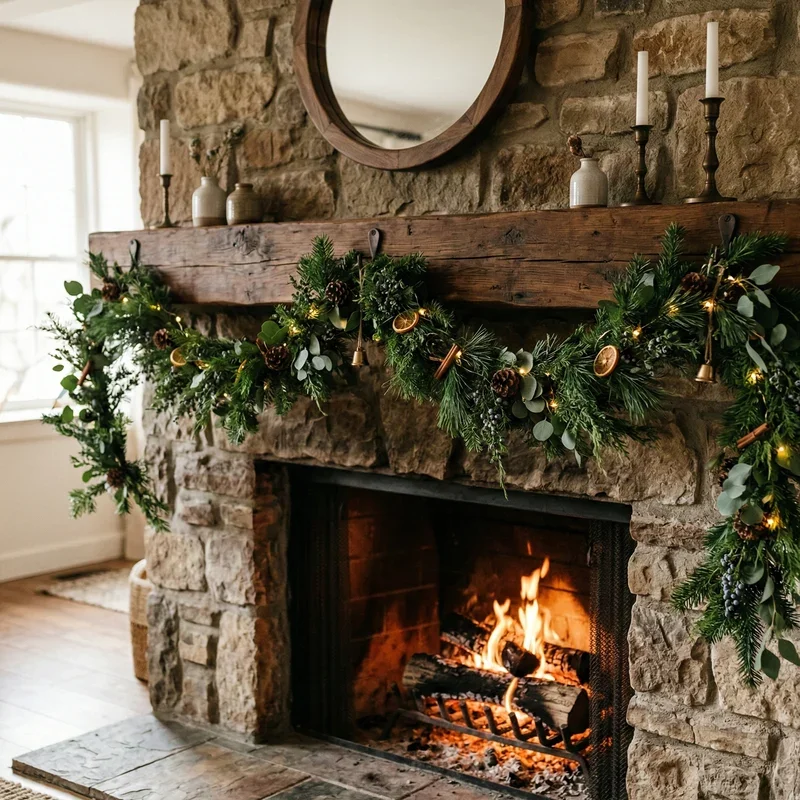
There's nothing quite like a beautifully decorated fireplace to make your home feel festive and welcoming during the holiday season. That lush green garland draped elegantly across your mantel creates the kind of cozy atmosphere that makes guests feel right at home and fills your own heart with seasonal cheer.
But here's what nobody tells you when you're standing in the store admiring those perfectly styled display fireplaces. Getting garland to look that good at home isn't always as straightforward as it seems. That gorgeous cascade of greenery you envisioned can quickly become a frustrating mess of droopy branches and visible hardware if you don't know the tricks of the trade.
We've all been there. You buy the most beautiful garland you can find, bring it home full of excitement, and then spend the next hour watching it slide off your mantel repeatedly while questioning your life choices. Or worse, you finally get it to stay put only to realize it looks nothing like the Pinterest inspiration that started this whole adventure.
Understanding how to hang garland on fireplace step by step transforms this potentially maddening project into an enjoyable creative endeavor. With the right approach, supplies, and techniques, you can create magazine-worthy displays that look professionally designed without spending a fortune on decorators.
This comprehensive guide will walk you through everything from measuring and planning to the final fluffing touches that make garland look full and fabulous. Whether you're decorating for Christmas, a special celebration, or simply want to add some natural beauty to your living space, these tips will serve you well.
Ready to turn that bare mantel into a showstopper? Let's get started.
Gathering Your Supplies
Before diving into the actual hanging process, let's make sure you have everything you need.
Essential Materials
The foundation of any successful garland installation starts with having the right supplies on hand. Nothing derails a decorating project faster than stopping midway to run to the store.
Garland itself comes in various lengths, typically ranging from six to eighteen feet. For most standard mantels, nine feet provides adequate coverage with some drape on the ends. Longer mantels or more dramatic styling requires additional length.
Command hooks or removable adhesive hooks work beautifully for damage-free hanging. These come in various weight capacities, so check your garland's weight and choose accordingly.
Green floral wire or zip ties serve as your secret weapons for securing garland sections without visible hardware. The green color blends seamlessly with foliage.
Fishing line or clear string provides invisible support for creating swoops and drapes. This material virtually disappears against most backgrounds.
Optional Enhancement Supplies
Beyond the basics, several additional items can elevate your garland from nice to absolutely stunning.
Battery-operated fairy lights add magical sparkle without the hassle of cord management near your fireplace. Look for options with timers for convenience.
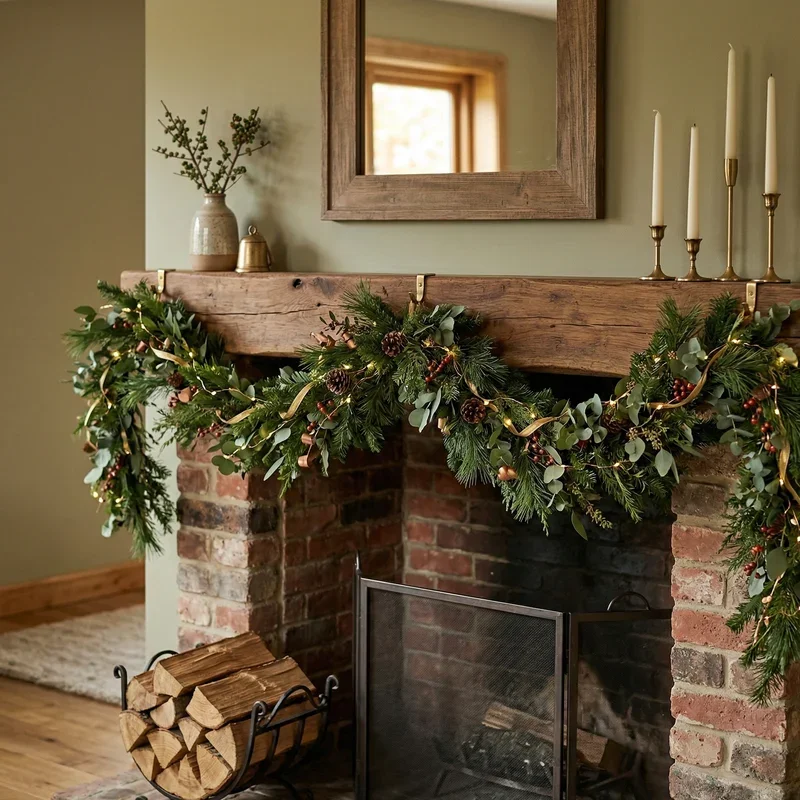
Wired ribbon in coordinating colors allows you to create beautiful bows and flowing tails that complement your garland.
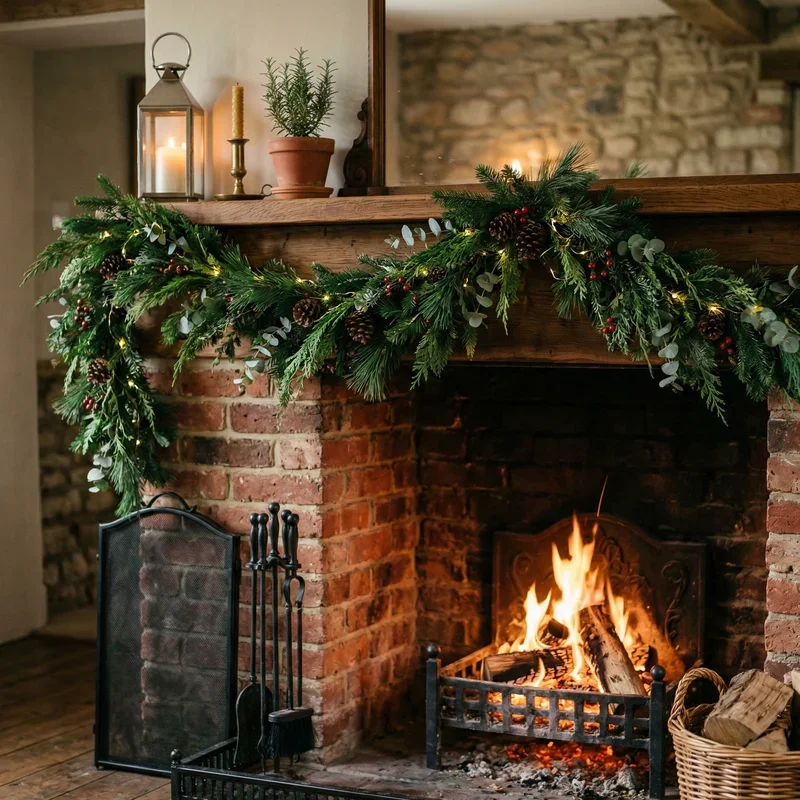
Floral picks with ornaments, berries, or pinecones make adding decorative accents easy. The picks simply insert into the garland rather than requiring additional attachment.
Extra greenery picks help fill sparse areas and customize generic garlands to look more luxurious and full.
Planning Your Layout
Rushing into garland installation without planning typically leads to frustration and less-than-ideal results.
Measuring Your Space
Grab your tape measure before touching that garland. Measure your mantel length from end to end, then decide how much drape you want hanging down each side.
For a classic look, plan for twelve to eighteen inches of vertical drape on each end. Dramatic styling might include longer tails reaching three feet or more.
Add these measurements together to determine your total garland length needs. A seventy-two inch mantel with eighteen inch drops on each side requires at least nine feet of garland.
Visualizing Your Design
Hold up your garland loosely to preview how different arrangements look before committing to any hardware placement.
Consider whether you want a centered swag that dips elegantly in the middle, a straight horizontal arrangement, or asymmetrical styling with varying heights.
Take photos on your phone of different positions. Sometimes what looks good in person translates differently in photos, and you'll likely want to share your beautiful work on social media anyway.
How to Hang Garland on Fireplace Step by Step: The Installation
Now we're getting to the actual hanging process. Take your time with these steps for best results.
Step One: Clean and Prepare Your Mantel
Wipe down your mantel surface completely before starting. Dust, debris, and residue prevent adhesive hooks from bonding properly and can cause garland to slide.
If using removable adhesive hooks, follow manufacturer instructions precisely. Most require pressing firmly for thirty seconds and waiting an hour before applying weight.
Remove any existing decor that might interfere with your garland placement. You'll add decorative items back later once the garland is secure.
Step Two: Position Your Primary Hooks
For a basic centered arrangement, place your first hook at the center point of your mantel. This anchor point supports the middle of your garland.
Add additional hooks near each end of the mantel, typically about two inches from the corners. These end hooks prevent garland from sliding off the edges.
If planning a swooped design, add intermediate hooks between center and corners where you want your garland to dip down.
Step Three: Attach the Garland Center
Start at the middle rather than the ends. This ensures your design remains symmetrical and centered.
Drape the garland's midpoint over or around your center hook. Use floral wire to secure this connection if the hook alone doesn't hold firmly enough.
Step back and verify the center placement looks correct before proceeding. Adjustments get more difficult once you've secured additional points.
Step Four: Secure the End Sections
Working from center outward, drape the garland across your mantel toward each end hook. This maintains the symmetry established by your center placement.
Allow the desired amount of garland to hang vertically at each end before securing to your end hooks.
Use additional floral wire or zip ties to ensure firm attachment at these end points. Gravity wants to pull your garland down, so secure connections here matter significantly.
Step Five: Create Swoops and Drapes
If your design includes swooping sections between hooks, now's the time to shape them.
Gently pull the garland downward between anchor points to create elegant curves. Use fishing line attached to hidden nails or hooks below the mantel to maintain these drapes.
Adjust swoop depths until they appear balanced and natural. Asymmetrical swoops look intentional, while slightly uneven swoops look like mistakes.
Step Six: Secure All Connection Points
Go back along the entire garland and reinforce every connection point with additional wire or ties.
The goal is invisible security. Each attachment should hold firmly without visible hardware peeking through the foliage.
Test your installation by gently tugging at various points. Better to discover weak spots now than have your garland crash down during a holiday party.
How to Hang Garland on Fireplace Step by Step: Adding Finishing Touches
With the basic installation complete, now comes the fun part of customization and enhancement.
Fluffing and Shaping
Fresh-from-package garland typically looks flat and compressed. Taking time to fluff properly makes an enormous difference in final appearance.
Separate and bend individual branch sections outward to create fullness. Work systematically along the entire garland rather than focusing intensely on one area.
Fill any obvious gaps by bending nearby branches to cover sparse spots. Strategic fluffing can make modest garland look luxurious and full.
Adding Lights
Weave battery-operated lights throughout your garland, tucking battery packs behind the foliage where they won't be seen.
Distribute lights evenly for consistent sparkle. Concentrated clusters of lights look odd while evenly spaced bulbs create magical ambiance.
Test your lights before weaving them throughout. Discovering a dead strand after it's fully integrated into your garland is genuinely frustrating.
Incorporating Ribbons and Bows
Ribbon adds color, texture, and elegance to garland displays. Wired ribbon holds shapes better than unwired varieties.
Create bows separately, then attach them to your garland using floral wire pushed through the bow's center loop.
Trail ribbon tails throughout the garland, weaving them through branches for an integrated look rather than simply laying ribbon on top.
Adding Decorative Accents
Floral picks with ornaments, berries, pinecones, or other embellishments enhance your garland's personality.
Insert picks by pushing their wire stems directly into the garland's core. Distribute accents evenly while maintaining visual balance.
Step back frequently to evaluate your work from viewing distance. Details that seem perfect up close can look cluttered or sparse from across the room.
Safety Considerations
Decorating should be fun, not dangerous. Keep these safety points in mind.
Fire Safety
Never use real candles anywhere near garland, whether the garland is fresh or artificial. One moment of inattention can turn into disaster.
If using your fireplace while garland is installed, ensure adequate clearance between flames and any decorative materials. Heat rises, so overhead garland can be at risk even without direct flame contact.
Battery-operated candles provide the flickering glow of real flames without any fire risk. Modern versions look remarkably realistic.
Secure Installation
Verify your garland installation can't fall and create tripping hazards or knock over other items.
Pay particular attention if you have children or pets who might tug on dangling garland ends. Additional securing at the bottom prevents curious hands or paws from pulling everything down.
Check your installation periodically throughout the season. Adhesive can weaken over time, and connections can loosen.
Troubleshooting Common Problems
Even the best-planned installations sometimes encounter issues.
Garland Keeps Sliding
This usually means insufficient grip at your anchor points. Add more hooks or reinforce existing connections with additional wire.
Consider textured grip pads beneath the garland at key points. These provide friction that prevents sliding.
Very heavy garland might require small finishing nails or screw-in hooks rather than adhesive options.
Sparse or Flat Appearance
Combine multiple garland strands for fuller looks. Layering a thin garland over a bushier one creates depth and lushness.
Additional greenery picks inserted throughout sparse areas work wonders. A few dollars in picks can transform budget garland into something spectacular.
Uneven Appearance
Remove and restart if your garland looks significantly unbalanced. Fighting an uneven installation rarely produces good results.
Sometimes the issue is the garland itself rather than your installation. Cheap garlands often have inconsistent fullness that no amount of adjusting fixes.
Styles and Variations
Different approaches suit different tastes and spaces.
Classic Traditional
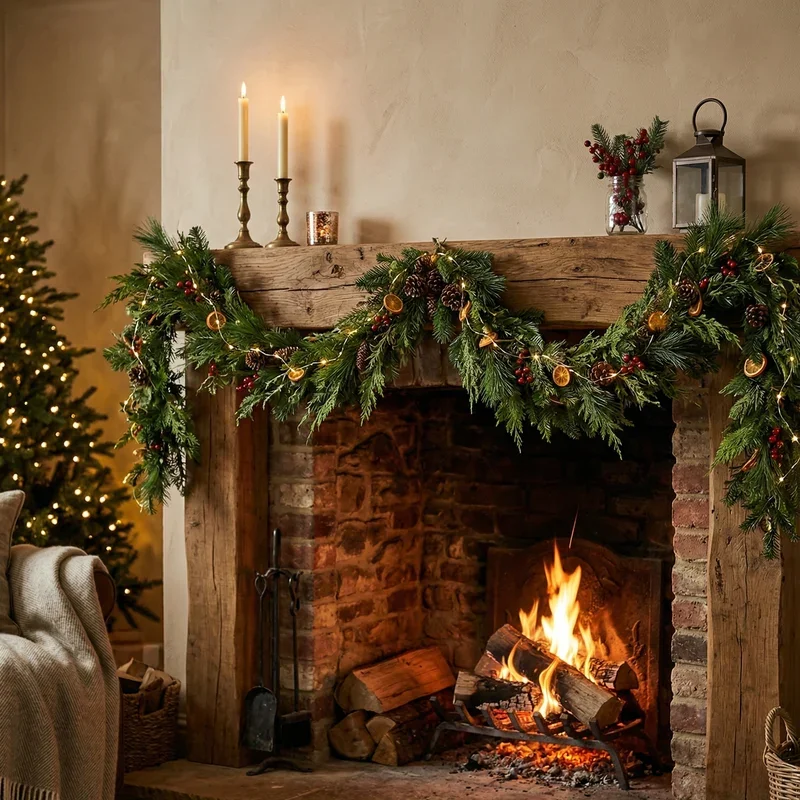
Symmetrical placement with centered swag represents timeless elegance. Add red bows, gold ornaments, and white lights for traditional holiday styling.
This approach works particularly well in formal living rooms and with traditional decor themes.
Rustic Natural
Asymmetrical arrangements with natural pinecones, wooden elements, and warm-toned lights create cozy cabin vibes.
Consider fresh or realistic-looking garland rather than obviously artificial options for this style.
Modern Minimalist
Simple horizontal placement without dramatic swoops suits contemporary spaces. Choose monochromatic accents and subtle lighting.
Less is more with this approach. Let the garland speak for itself without heavy embellishment.
Glamorous Sparkle
Abundant lighting, metallic ornaments, and luxurious ribbon create showstopping displays.
Layer multiple light strands for maximum sparkle. Don't be shy about ornament quantity in this style.
Conclusion
Mastering how to hang garland on fireplace step by step transforms your mantel into a stunning focal point that anchors your entire seasonal decorating scheme. Starting with proper supplies, careful planning, and patient installation ensures your garland stays securely in place while looking professionally styled. The finishing touches of fluffing, lighting, and thoughtful embellishment elevate simple greenery into breathtaking displays that make your home feel truly festive. With these techniques in your decorating toolkit, you'll create beautiful garland arrangements year after year.
Read next: 15 Staircase Gallery Wall Ideas for Stylish Homes
Frequently Asked Questions
1.How do I hang garland without damaging my mantel surface?
Use removable adhesive hooks rated for appropriate weight to avoid nail holes or surface damage.
2.What length garland do I need for a standard six-foot mantel?
Purchase nine feet minimum to allow adequate drape at both ends plus some styling flexibility.
3.Can I hang garland on a stone or brick fireplace surround?
Yes, use brick clips or removable adhesive hooks designed specifically for rough textured surfaces.
4.How do I make cheap garland look more expensive and full?
Layer two strands together and add greenery picks throughout to fill sparse areas effectively.
5.Is it safe to hang garland above a working fireplace?
Yes, but maintain at least twelve inches clearance from heat sources and never use near open flames.
Stay up to date with our latest ideas!