How to Hang Curtains in a Bay Window Step by Step
Discover how to hang curtains in a bay window step by step with practical tips on measuring, hardware, installation, and styling your space beautifully.

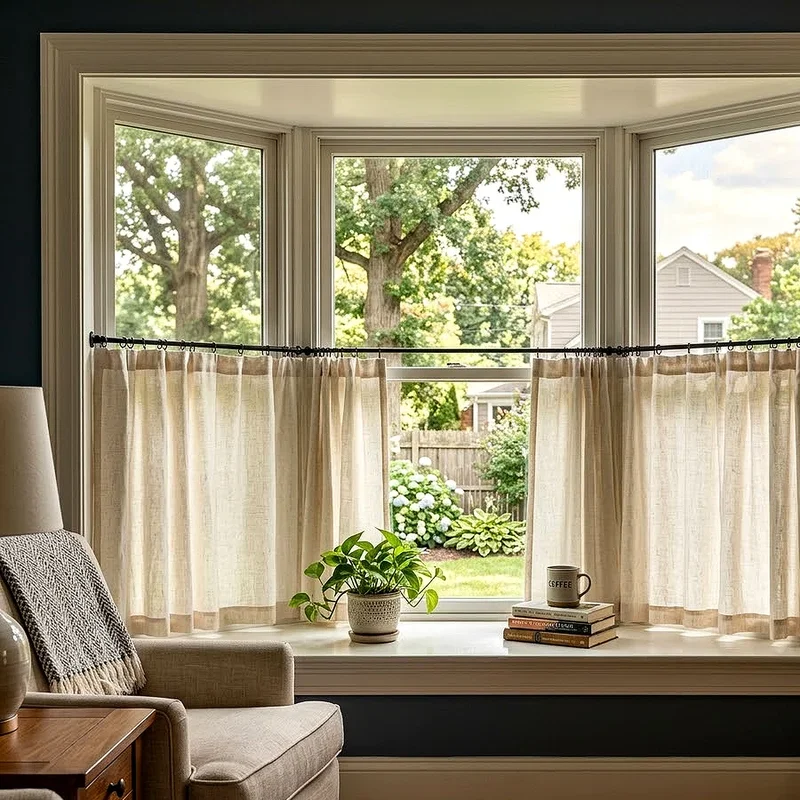
Bay windows are gorgeous, no question about it. They flood rooms with light, create cozy nooks for reading, and add architectural charm money simply can't replicate. But hanging curtains on one? Yikes, that's where many homeowners hit a wall. The angles, the multiple panes, the awkward corners, all of it can feel like solving a puzzle without instructions. Don't sweat it though, because this How to Hang Curtains in a Bay Window Step by Step guide breaks everything down into manageable bites. Whether you're a seasoned DIYer or someone who avoids power tools like the plague, you'll walk away ready to tackle this project with genuine confidence.
Why Bay Windows Deserve Special Treatment
Before grabbing your tools, let's chat about what makes bay windows different. Unlike standard flat windows, bay windows project outward from the wall in three or sometimes five sections. Each section sits at a slight angle, creating that lovely alcove effect inside. This unique geometry means standard curtain rods just won't cut it. You need hardware that bends, custom-cut rods, or multiple individual rods working in harmony. Treating a bay window like any old window leads to gaps, awkward bunching, and curtains that refuse to close properly. Recognizing this difference upfront saves time, money, and a whole lot of frustration later.
Choosing the Right Curtain Style for Your Bay
Picking curtains for a bay window goes beyond just liking a color. The style impacts how well your panels function within those tricky angles. Light, flowing fabrics like linen or cotton drape gracefully and accommodate corners better than stiff materials. Heavy velvet curtains add drama but can look bulky and bunch awkwardly at angled junctions. Sheer panels paired with blackout liners give you flexibility, letting you control light without sacrificing style. Length-wise, floor-grazing curtains create elegance while shorter sill-length options work better in bay windows used for seating. Match the style to the room's vibe and the window's purpose.

Tools and Materials You'll Need
Gathering everything beforehand prevents those annoying mid-project trips to the hardware store. Here's a list of what'll make your life easier:
Measuring tape, the sturdier the better.
Pencil for marking placement points clearly.
Stud finder to locate solid wall sections.
Drill with appropriate bits for your wall material.
Screwdriver, both flathead and Phillips head.
Level, ideally a small bubble level or laser level.
Step ladder tall enough to reach the top of the window comfortably.
Curtain rods, brackets, or a flexible bay window rod system.
Wall anchors if you're drilling into drywall without studs.
Curtain panels themselves, washed and ironed before hanging.
Having all this gear within arm's reach means you can keep working without breaking momentum. Trust me, momentum matters when you're balancing on a ladder.
Measuring Your Bay Window Accurately
Measuring sounds simple until you realize how much it affects everything else. Start by measuring the width of each individual section across the bay. Most bay windows have three sections, but some have five. Write down each measurement separately because they're rarely identical, even when they look it. Next, measure the height from where you plan to mount the rod down to where you want the curtains to end. For a luxurious look, mount rods four to six inches above the window frame and extend curtains all the way to the floor. Double-check every number before moving forward, since cutting hardware short ruins everything.
How to Hang Curtains in a Bay Window Step by Step: Picking Your Hardware Approach
You've got three main hardware routes to consider, and each comes with trade-offs. Option one involves a single flexible bay window rod that bends to follow your window's angles. These rods install quickly and create a continuous curtain line, but heavier panels can sag in the middle sections. Option two uses three or more separate rods, one for each window section, joined at the corners with connector hardware. This approach handles weight better but means more brackets to install. Option three involves ceiling-mounted tracks that follow the bay's curve, offering the cleanest look but requiring more advanced installation skills.
Locating Studs and Marking Bracket Positions
Wall studs are your friends when hanging anything heavy, and curtain rods loaded with fabric definitely qualify. Run your stud finder along the wall above each window section, marking solid spots with a pencil. If studs don't align with where you need brackets, you'll need wall anchors rated for the weight of your hardware and curtains combined. Mark bracket positions evenly above each window, ensuring they're at the same height across all sections. Using a level here is non-negotiable because even a slight tilt becomes glaringly obvious once curtains hang. Take your time during this stage since rushing creates problems you can't easily fix.
Drilling Pilot Holes Without Drama
Pilot holes prevent split wood, cracked drywall, and crooked screws. Choose a drill bit slightly smaller than your screws, then drill straight into your marked spots. Keep the drill perpendicular to the wall, since angled holes cause brackets to sit unevenly. If you're drilling into plaster or older walls, go slow to avoid blowouts. For drywall installations without studs, push wall anchors into the holes until they sit flush, then drive screws through your brackets into the anchors. Don't overtighten because crushing the drywall behind the anchor weakens its grip considerably. Easy does it works wonders here.

Mounting Brackets Securely
Once pilot holes are ready, attach your brackets one at a time. Hold each bracket in place, insert screws, and tighten gradually. Avoid cranking down with all your strength because stripped screws and damaged brackets become real problems. Check level frequently as you work, adjusting before fully tightening if anything looks off. For corner brackets in multi-rod setups, ensure they sit at matching heights to prevent visible step-downs in your curtain line. Stand back occasionally and eyeball the entire installation. Sometimes your eyes catch alignment issues that levels miss, especially across longer spans where small variations compound visibly.
How to Hang Curtains in a Bay Window Step by Step: Installing the Rods
With brackets secured, it's time for the rods themselves. For flexible bay rods, gently bend the rod to match your window's angles before lifting it into the brackets. Don't force sharp bends because most flexible rods have specific minimum bend radiuses listed in their instructions. For multi-rod systems, slide curtain rings or grommets onto each rod section before connecting them at the corners. This step seems obvious until you forget and have to disassemble everything to add rings later. Trust me, that's a special kind of frustration nobody needs in their life.
Hanging Your Curtain Panels
Now comes the satisfying part. Slide your curtain panels onto the rods using whatever attachment method matches your curtains. Grommet-top curtains thread directly onto the rod, while rod-pocket styles slide on through the sewn-in pocket. Tab-top and pleated curtains require hooks or rings. Distribute fabric evenly across each section, leaving slight overlap at corners to prevent gaps when curtains close. Step back regularly to assess the look. Are the panels hanging straight? Do the corners line up nicely? Adjust rings, hooks, or fabric placement as needed before everything settles into position. Patience pays off here.
Styling for That Magazine-Worthy Finish
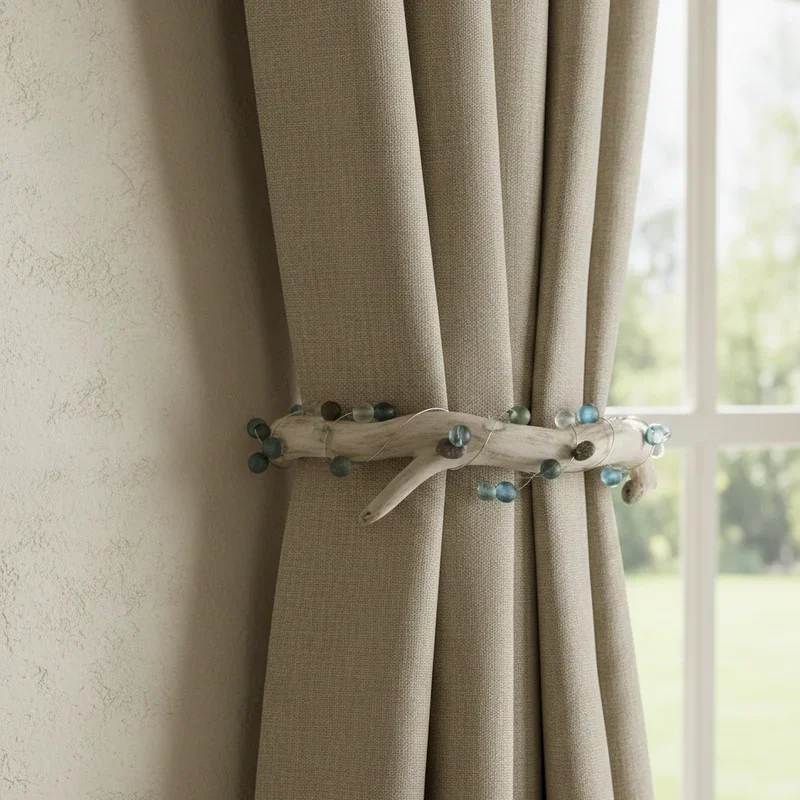
Once everything's hanging, a few finishing touches transform decent into stunning. Steam or iron your curtains while they're hanging to remove fold lines from packaging. Train the folds by gathering each panel into pleats and tying them gently with ribbon or fabric strips for a couple of days. This trick teaches the fabric to drape consistently. Add tiebacks at curtain-rod height or slightly lower to create elegant sweeping curves when you want curtains pulled aside. Layering sheer panels behind heavier drapes adds depth and lets you control light beautifully throughout the day. Small touches make enormous differences.
Common Pitfalls to Steer Clear Of
Even careful folks run into snags during this kind of project. Sidestepping these common mistakes saves headaches:
Mounting brackets too close to the window frame, eliminating that visually expanding effect.
Skipping pilot holes and stripping screws or cracking walls.
Using lightweight hardware for heavy curtains, leading to sagging or pull-outs.
Forgetting to factor in curtain stack-back space, blocking light when fully open.
Buying curtains before measuring properly, ending up with panels that don't fit.
Ignoring corner gaps, which let light leak through dramatically at sunrise.
Each of these mistakes is fixable, but avoiding them saves significant time and money. A little preparation upfront beats a lot of correction afterward, every single time.
Dealing With Awkward Window Configurations
Not every bay window plays nice. Some have built-in seating, radiators, or odd architectural features that complicate curtain installation. For windows with built-in benches, opt for sill-length curtains that don't pile up on the seating surface. Radiators below windows? Stick with curtains that stop just above the radiator to prevent heat blockage and fire risks. Crown molding or unusual ceilings might require ceiling-mounted hardware instead of wall mounts. Each quirk has solutions, but they require flexibility in your approach. Don't force standard solutions onto non-standard situations because you'll fight your home's architecture instead of working with it.
Layering Window Treatments Effectively
Combining different window treatments takes bay windows from nice to absolutely show-stopping. Start with blinds or shades mounted inside each window frame for privacy and light control. Layer floor-length curtains over the top using the techniques covered earlier. This combination gives you maximum flexibility, since you can use shades during bright midday hours and pull curtains closed for evening coziness. Choose treatments that complement rather than compete. If your blinds are bold, keep curtains simple. If curtains have busy patterns, opt for plain white or natural-toned blinds. Balance creates harmony, while clashing elements feel chaotic.
How to Hang Curtains in a Bay Window Step by Step: Final Adjustments and Maintenance
After everything's installed, give yourself a day or two before declaring victory. Curtains often need minor tweaks once they've settled. Watch how light moves through the room throughout the day, noticing any gaps or awkward draping. Adjust panel placement, train folds, or add weights to bottom hems if curtains flare out unnaturally. For ongoing maintenance, vacuum curtains monthly using an upholstery attachment to prevent dust buildup. Wash or dry clean according to fabric care labels every six to twelve months. Properly cared-for curtains last years, while neglected ones look tired within a single season.
Tips for Renters Who Can't Drill
Renters, listen up because there's hope for you too. Tension rods designed for bay windows fit between walls without any drilling required, though they support lighter curtains only. Adhesive curtain rod brackets handle medium-weight panels without damaging walls if applied correctly. Magnetic rods work on metal-framed windows, offering yet another drill-free option. Some companies make bay window curtain solutions specifically marketed as rental-friendly. The trade-off usually involves slightly less stability and lower weight capacity, but you can absolutely have beautiful bay window curtains without losing your security deposit. Where there's a will, there's definitely a way.

When to Call in the Pros
Sometimes DIY isn't the right call, and that's perfectly okay. If your bay window has unusual angles, very high ceilings, or requires modifications to existing trim, hiring a professional installer or interior designer makes sense. The cost typically runs reasonable for complex installations, and you avoid potential mistakes that could damage your home. Custom curtain workrooms can also create panels designed specifically for your bay's exact dimensions, ensuring perfect fit and drape. Knowing your limits isn't weakness, it's wisdom. Save the DIY energy for projects that match your skill level and time constraints.
Conclusion
Hanging curtains in a bay window doesn't have to feel like decoding hieroglyphics. With careful measuring, the right hardware, and a little patience, you can transform that gorgeous architectural feature into a stunning focal point of your room. Take your time during planning, gather quality tools, and don't rush the installation steps. Whether you go with flexible rods, multiple sections, or ceiling tracks, the results pay off enormously. Step back when finished, admire your handiwork, and enjoy the cozy, elegant atmosphere your new curtains bring to your space.
Read next: 15 Unique Curtain Tie Back Ideas for Stylish Homes
Frequently Asked Questions
1. What's the best curtain rod type for bay windows generally?
Flexible bay window rods or three-piece connecting rod systems work best for most standard bay windows.
2. How high should curtain rods be mounted above bay windows?
Mount rods four to six inches above the window frame for visually expanding ceiling effect.
3. Can I use regular curtains in a bay window?
Yes, regular curtains work fine when paired with bay-specific rods or multiple coordinated rod sections.
4. Should curtains touch the floor in a bay window?
Floor-length curtains create elegance, but sill-length options work better with built-in window seating.
5. Do bay window curtains need to overlap at corners?
Yes, slight overlap at corner sections prevents light gaps and creates a polished finished look.
Stay up to date with our latest ideas!